Configuration
How to proceed with the website general settings, like the title, description, changing the logo, how to configure the payment gateways (PayPal, Stipe, ...), setting up the mailer to send and receive email message ... etc.
#General
Admin > Settings > General
In the general settings page you can configure the following points :
Name : The website name
Title : The website title
Description : The website description
Email : The website main email address
Keywords : The website keywords
Items per page : The number of items to show per page
Marquee mode for homepage categories : Enable marquee mode from homepage categories
Timezone : The website timezone
Main language : The website main language
Languages : The website languages. You can leave the field empty to allow only one language for the website
Show placeholder items on the homepage : This helps having a good structure and look for the homepage of the website while you sill don't have enough items uploaded yet
Top menu white text on the homepage : Change the top menu text color to black or white
Homepage categories : Show or hide categories on the homepage, in addition to changing their background and text color
Featured items carousel : Show or hide the carousel on the items page, the carousel shows the items which are marked as "featured", you can also select the background color and a text carousel for this carousel
Hero section : You can change the text and background color for the top cover of the homepage, with an option to show / hide the image and the mask on the image. The background color is visible only when the image is hidden.
Footer section : Change the footer background color.
Cookie : Specify the cookie text content and and colors (text, background, button).
Homepage subheading : Change the text shown in every section of the homepage (trending items, free items, newest items, blog)
Logo : The website logo
Favicon : The website favicon
Hero cover : The cover to show on the hero section of the homepage and items page
Website cover : The cover to show when someone shares the website in social media
Upload instructions : The instruction to show on the upload page for authors (the cover size, screenshots, main file ... etc.)
Blog : Enabling / Disabling the blog ...
Cookie : The website cookie content and colors
Homepage subheadings : The subheading on the homepage for trending, featured, free items
Social links : The website socials pages (instagram, facebook, twitter, ...)
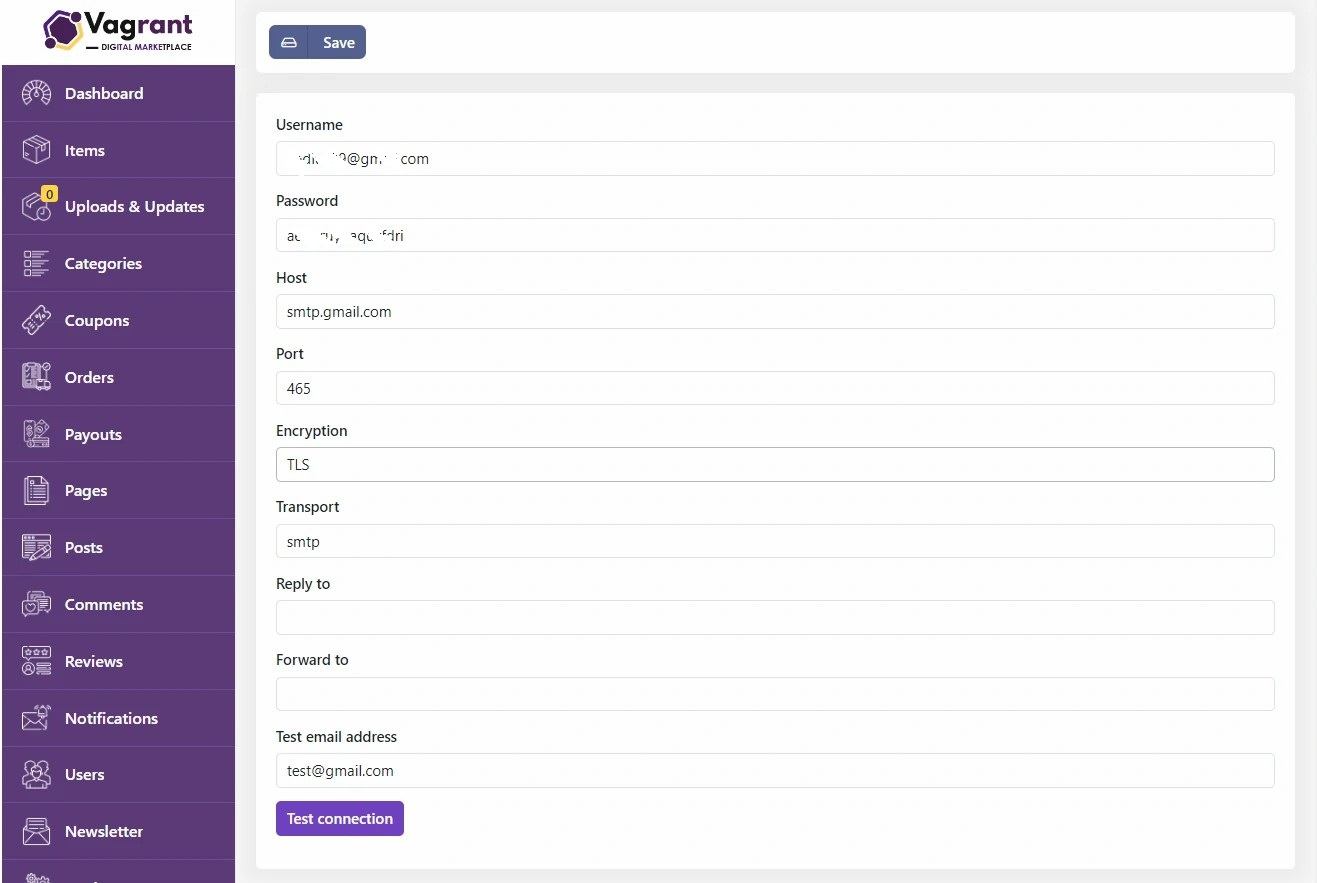
#Mailer (SMTP)
Admin > Settings > Mailer
Configuring the mailer to send and receive email messages
Create an email account on your server
Enter your email account address in "User" field and the password in the "Password" field
Enter your sever host address in "Host" field
For the port and encryption, you can either use port "465" with "tls" encryption for a secure connection or port 587 with "tls" encryption for a none secure connection. If "tls" encryption doesn't work with port "465", try changing it to "ssl"
Enter a "reply to" email address, it'll be used as the email address to which users reply to when they respond to your messages.
Enter a "forward to" email address, all email messages sent to your server account address will be forwarded to this "forward to" address.
You can check if the mailer credentials you entered are correct by clicking on "Check connection" button.
#Payment gateways
Admin > Settings > Payments
Configuring and enabling payment gateways, authorizing multiple currencies, enable / disable "Add to cart", allow / disallow guest checkout, enabling currency exchanger service ... etc.
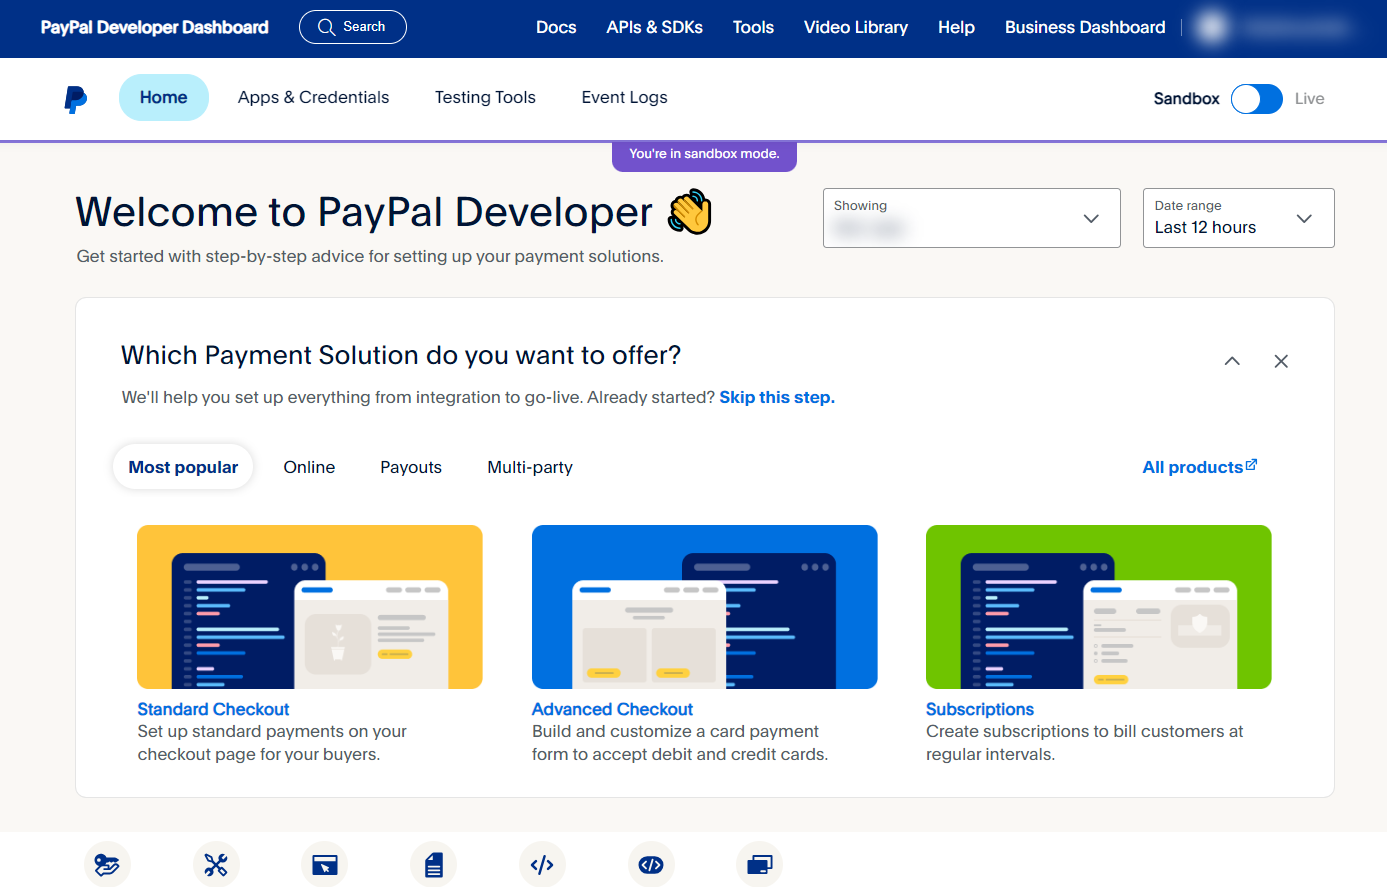
PayPal
Create a PayPal business account
Login to PayPal Developer Dashboard
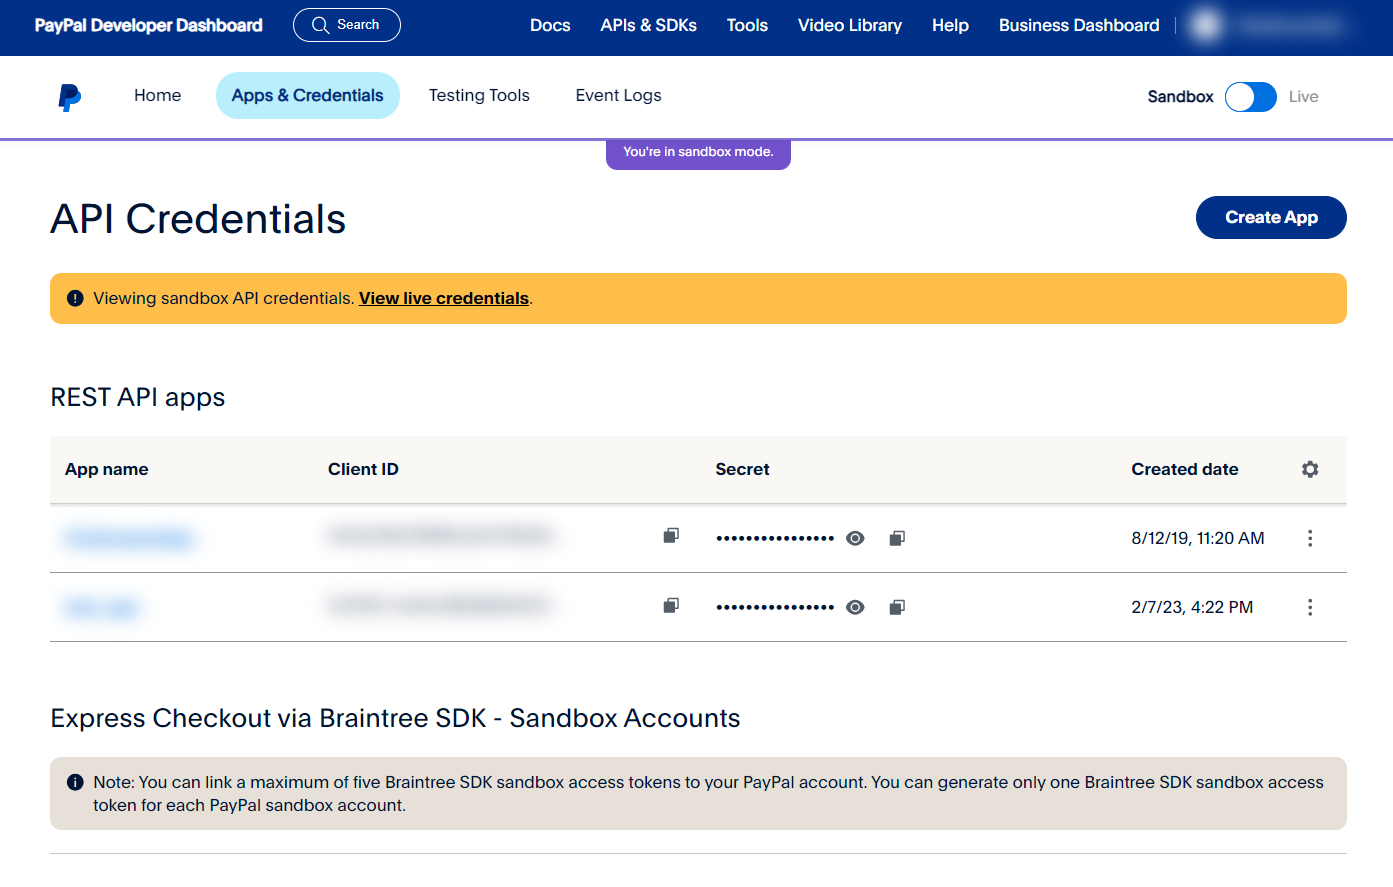
On the top menu, click on "Apps & Credentials" and then click again on "Create App" blue button
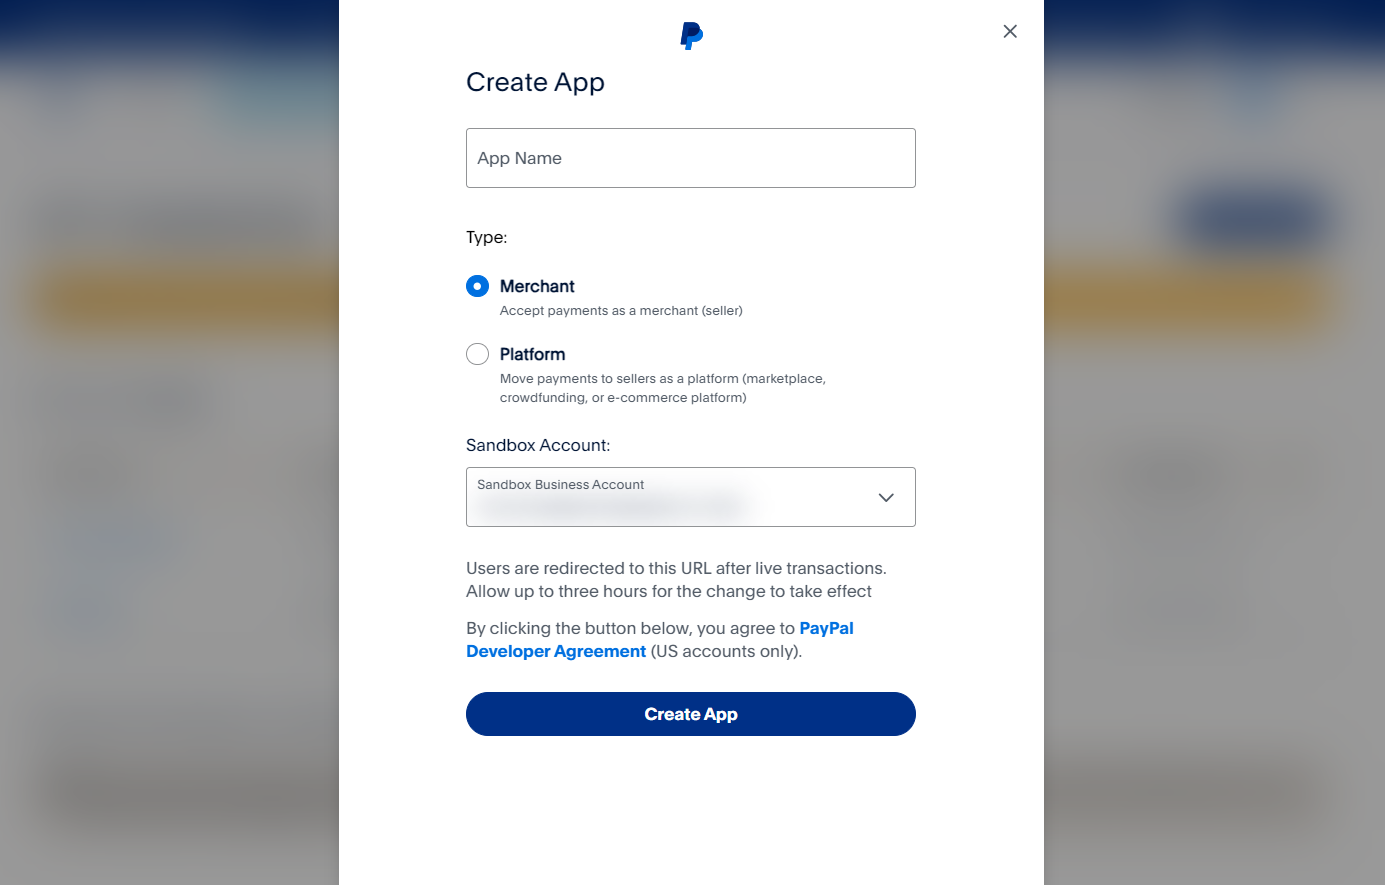
Enter a name for your application
For "App Type", select "Merchant - Accept payments as a merchant (seller)"
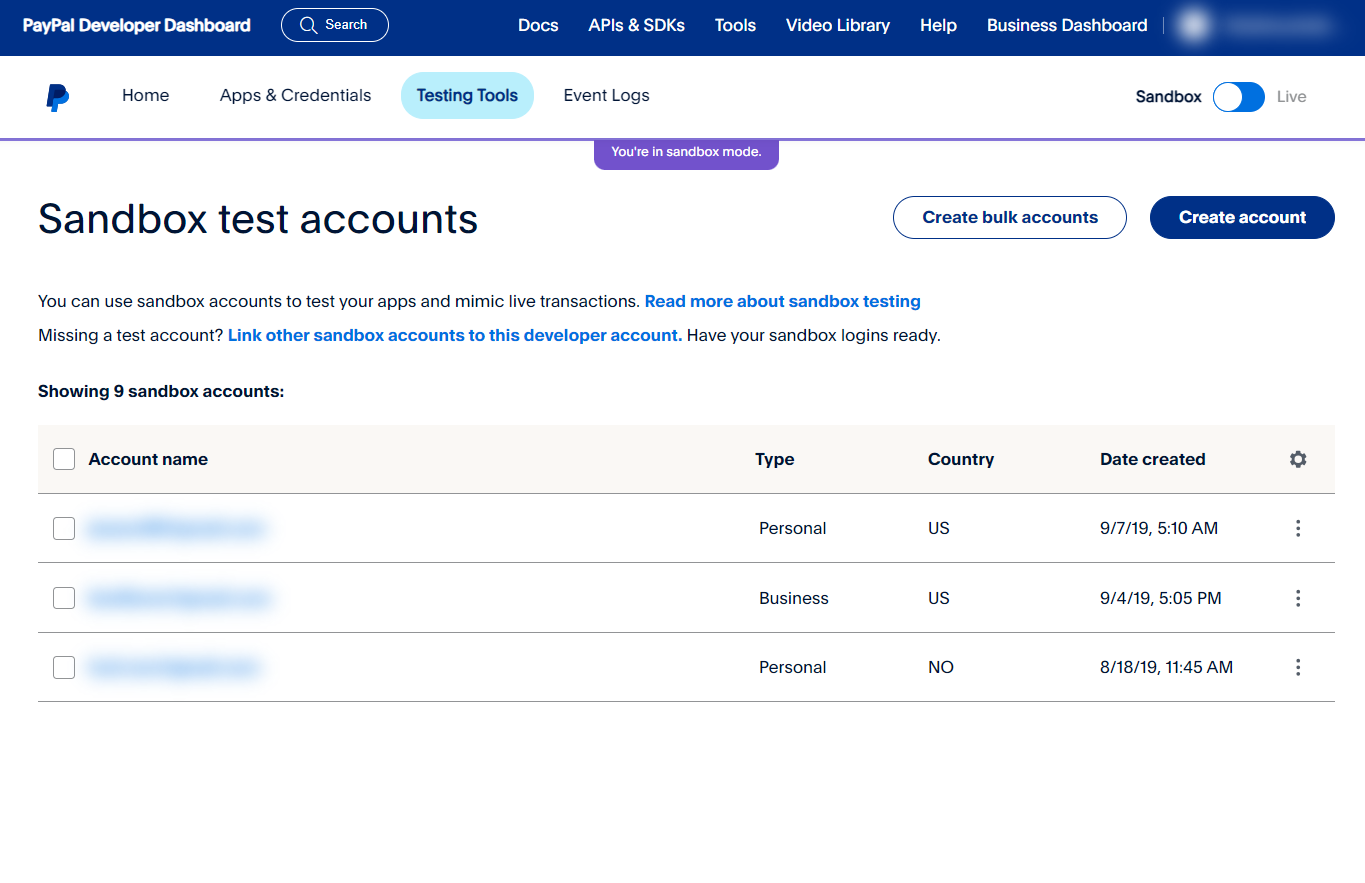
Select a sandbox account to use for testing payments / purchases, if you don't have one yet, you can create one from the top menu > Testing tools > Sandbox accounts, click on "Create account" blue button and select and an account type "Merchant" or "Personal", select a country and then click on "Create"
Click on "Create app" to terminate
On the next page, Copy the Client ID and Secret ID (click on Show to see it) and paste them to your website PayPal config page
For "App feature options" and "Webhook", leave everything as it is
Each mode (Test and Live) has its own credentials, when you change the mode, copy/paste the corresponding credentials to your website PayPal config again.

Stripe
Create a Stripe account
Login to your Stripe account dashboard
On the left menu, click on "Developers" and then "API Keys"
You will have a "Publishable key" which is the Client ID in your website and a "Secret key" which is the Secret ID in your website. Those two keys or IDs are for testing only (paypal sandbox equivalent mode).
In order to get Keys/IDs for non-testing mode (Live mode) you wil need to fill in the form Here and submit it to stripe for review.
Test cards can be found Here
Changing stripe store name and widget color / logo
Login to your stripe account
On the left menu, click on "settings", then, select "Account information"
In "Public business information / Public business name" enter your new business (store) name
You can edit the other fields too, 'support email', 'Statement descriptor', 'Business website' ...
For wiget color and logo, back to the previous page and select "Branding" (Public business information / Branding)
VAT (Tax)
You can specify a VAT (Value Added Tax) to apply on your sales. (Put 0 if not applicable)
Fee
Handling fee to apply on the checkout
Currency code & Currency symbol
A currency code (ISO format "GBP, USD, CAD ...") and a symbol if there is any (the "currency code" is mandatory).
Currency position
The place where to show the currency with the price, left or right.
Show prices in K format
Show prices in multiple of 1000, this can useful for currencies like crypto or IDR to avoid showing a long number.
Commission
The market commission rate
Payout methods
The payout methods allowed for authors (PayPal or Bank Transfer or both)
#File storage services
Admin
Configuring where to store images and uploaded files.
Server storage
For now the only storage driver supported is your server, all uploaded files will be stored on your server.
#Search engines
Admin > Settings > Search engines
Robots, site verification codes, Analytics codes
All site codes, from google, yandex, bing ... can be entered in "Site verification" field (paste the full HTML code as given by the search engine)
All analytics codes, from google, yandex, bing ... can be entered in "Analytics code" field (paste the full HTML code as given by the search engine)
#Chat
Admin > Settings > Chat
Chat services like Tawk, Crisp, Getgist ... etc.
Copy the code provided by the chat service to your website Admin / Settings / Chat / "Chat service" field and save the changes to activate it.
#Maintenance
Admin > Settings > Maintenance
Enable / Disable maintenance with IP acception, expiration time.
in "IP address to exempt", you can enter your IP address to keep having access to your website for a customization or debugging.
You can enable "Auto disable" option to turn off maintnance mode automatically once the expiration time is reached